

How to do all key lost for Toyota 8A with Xtool M822 Adpater
XTOOL M822 Adapter For Toyota 8A AIl Key Lost key Programming adapter M822 Support Function for Toyota 8A AIl Blade Key Lost Programming
With M822 Adapter, you can save as much as 65% of the calculation time on the process, or save you from plugging the key emulator in and out for hundreds of times.
2014-2019 For TOYOTA 4A/8A Smart Key Programming
Pincode-free
Add key/All keys lost supported
No specialized keys needed
XTOOL Device Compatible With M822:
X100 PAD3, X100 PAD3 SE, X100 MAX, XTOOL D8, D8BT, D9, D9PRO, A80, A80PRO, A80PRO MASTER, IP616, IP819, IP819TP, IK618
M822 Models Supported
For Toyota Levin
For Corolla
For RAV4
For Prado
For Land Cruiser
For Camry
For Highlander
For Reiz
For Sienna
For Hiace
For Hilux
For Crown Kluger
For Aygo with IMMO box F3-F4-K6-S6
XTOOL M822 Connection method
Connect via OBD:
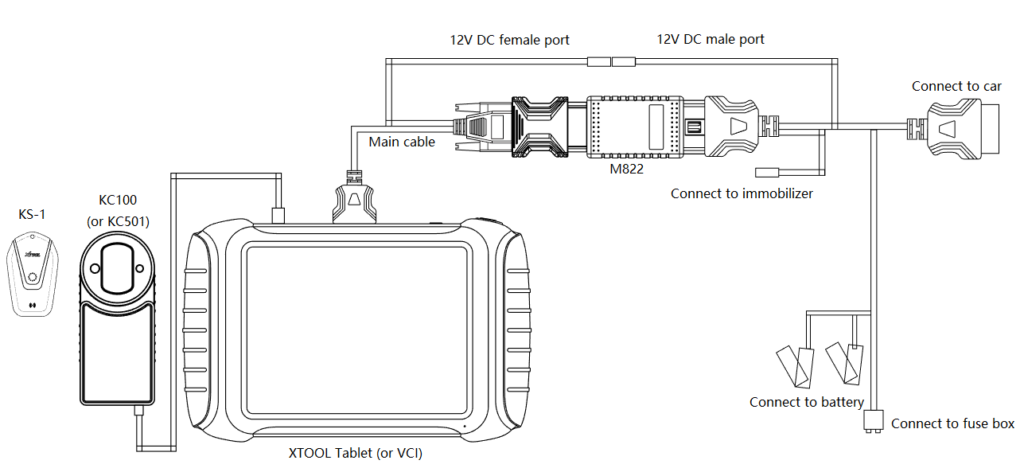
1. Connect KC100/KC501 to the device via USB and prepare a KS-1
2. Connect the device (or VCI box) with the M822 Adapter using the main cable.
3. Connect the Toyota cable to the car using OBD port.
4. Take the battery clip from the car out and use the battery clip to connect the cable to the battery.
5. Take out the fuse from the fuse box then plug the cable into it.
6. Find the 12V DC male port from the Toyota cable and connect it to the 12V DC female port from the main cable.
*Note: For different models, the connection method might not be same. Sometimes an extend cable is needed, and the fuse might be different. Please check XTOOL tablets for detailed wiring diagram when connecting to vehicle and fusebox.
How to do all key lost for Toyota 8A with M822:
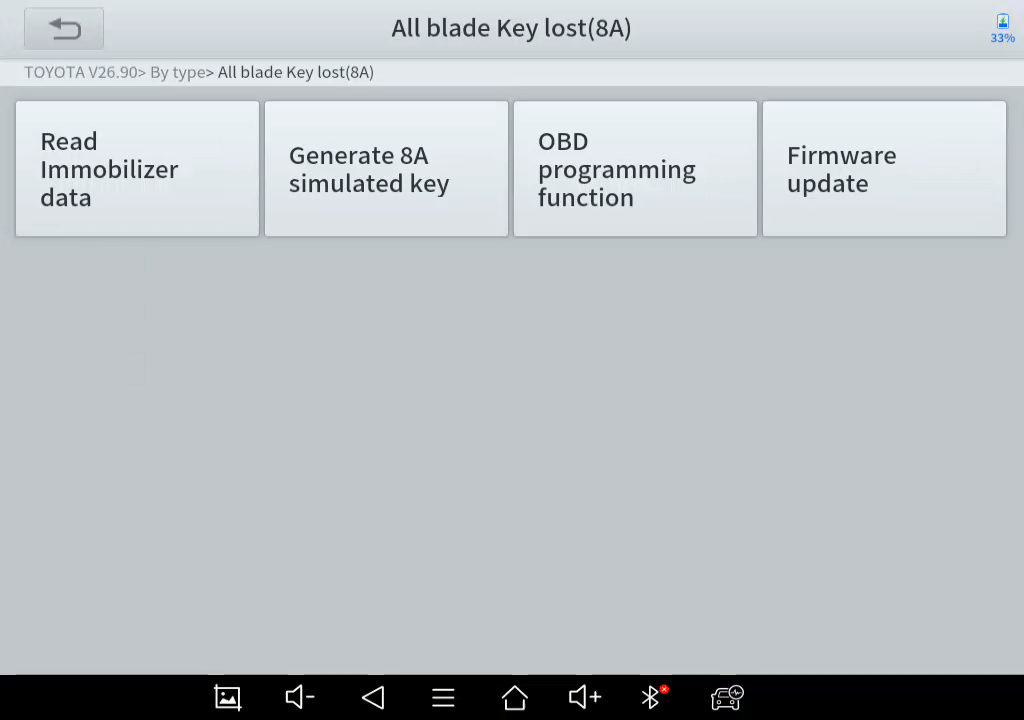
1. Open up Toyota software (V26.90 or higher) and go through these menus: By Type – All blade Key lost(8A). After that, this menu will show up.
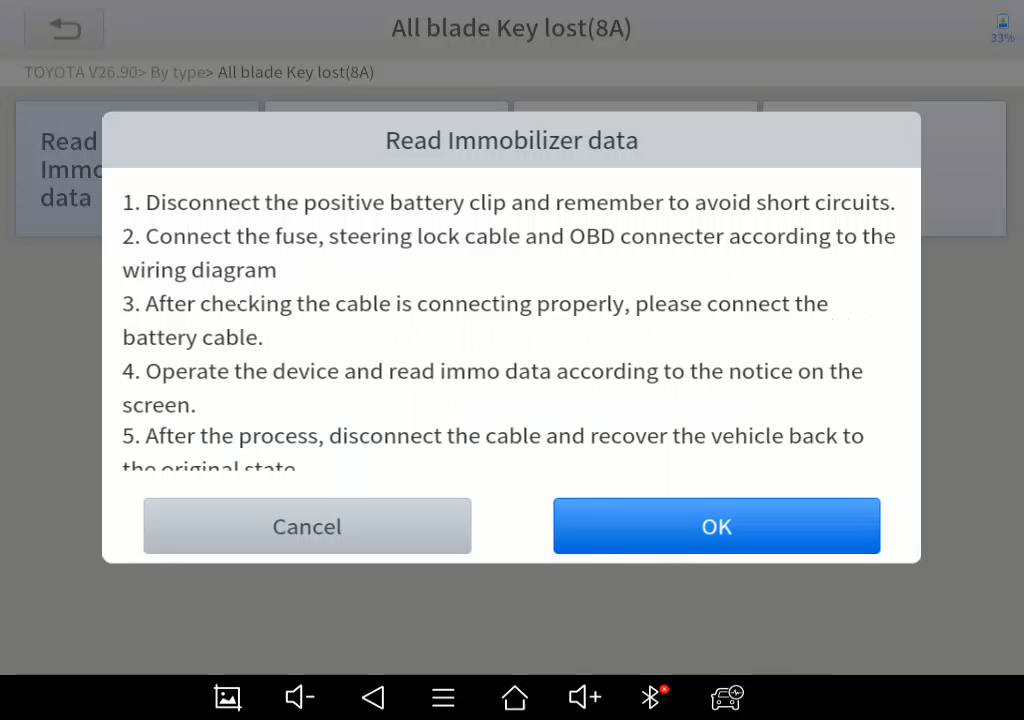
2. Select Read Immobilizer data. It will notice you to connect to the network, then tell you how to connect to the vehicle. Please check “Wiring diagram” for detailed connection method.
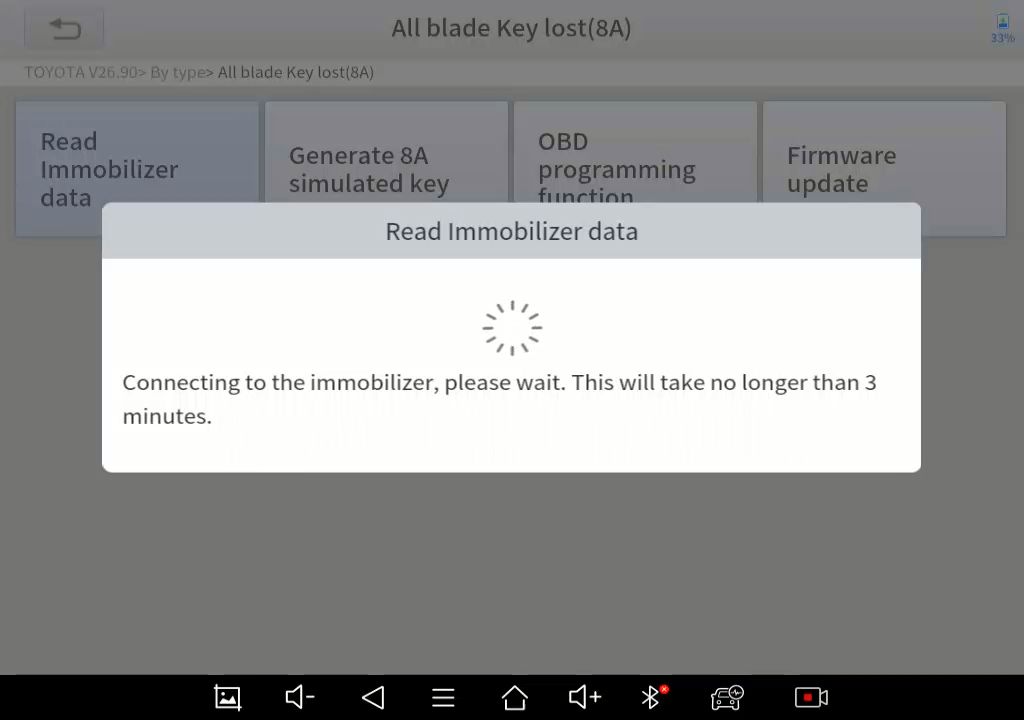
3. After connected to the car properly, click “OK” and the device will extract the data from the immobilizer. This will take no longer than 3 minutes so please wait patiently.
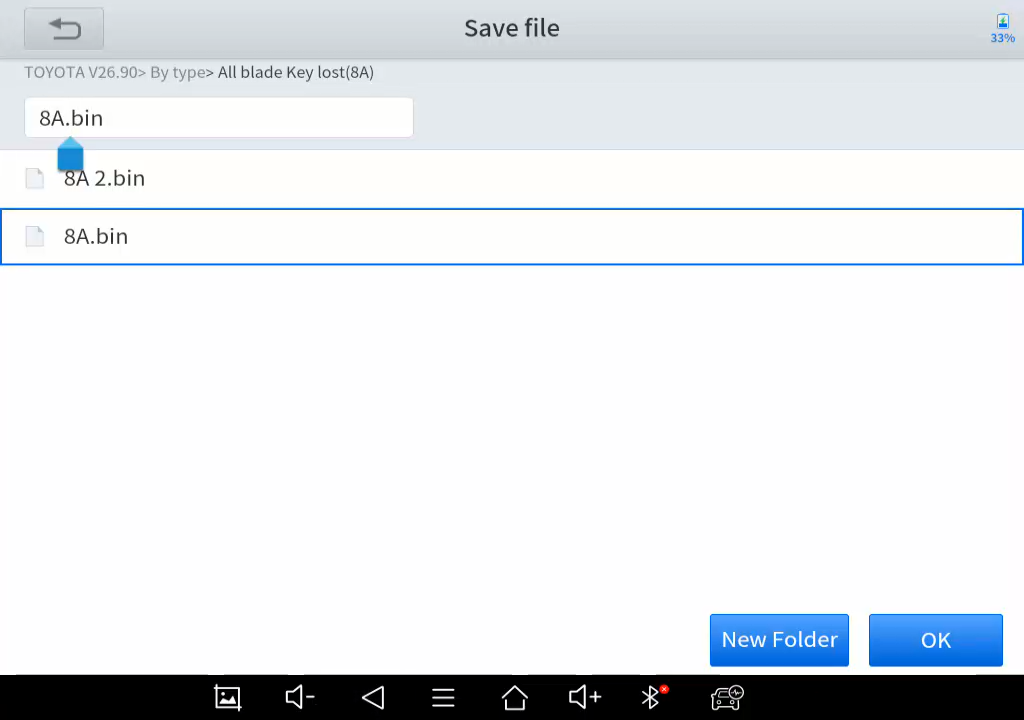
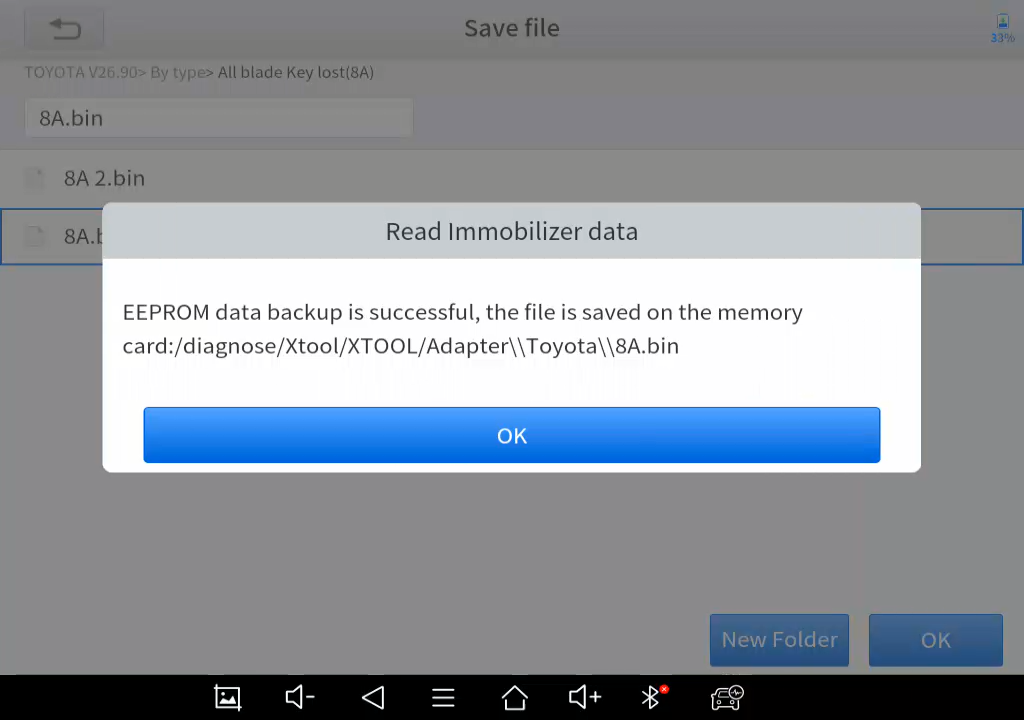
4. After the data is being read, you can name the data file and save it in Adapter/Toyota folder.
5.Now please disconnect the M822 Adapter and turn the vehicle back to its original state.
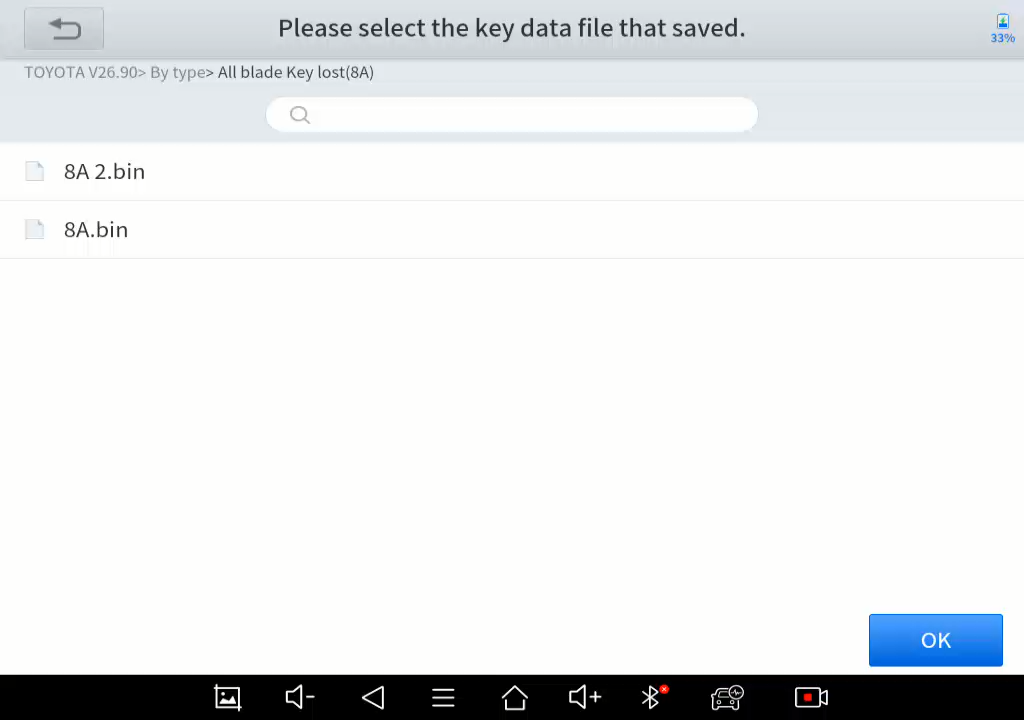
6. Make sure that the KC100/KC501 is connected and the KS-1 is ready, and the device is still connected to the network, then click “Generate 8A simulated key” menu, and select the data file that you saved before.
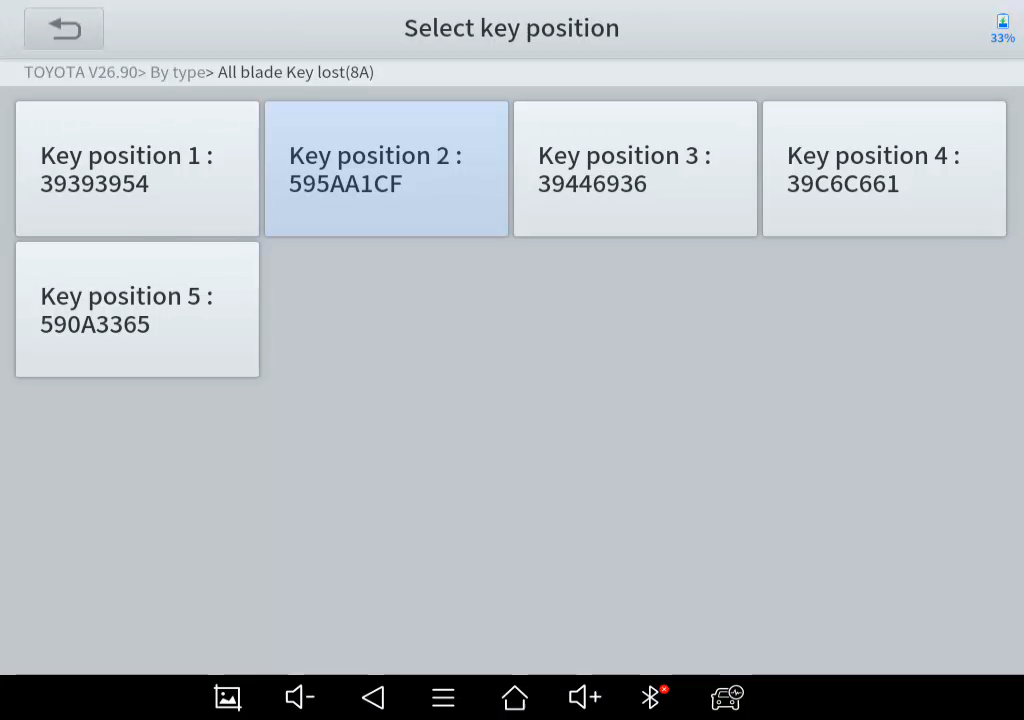
7. Select the key position. Please note that all the positions have an ID inside it, but only some of them corresponds to a registered key. Normally (if there are no any keys that have been erased), key position 1 or 2 have a registered key inside.
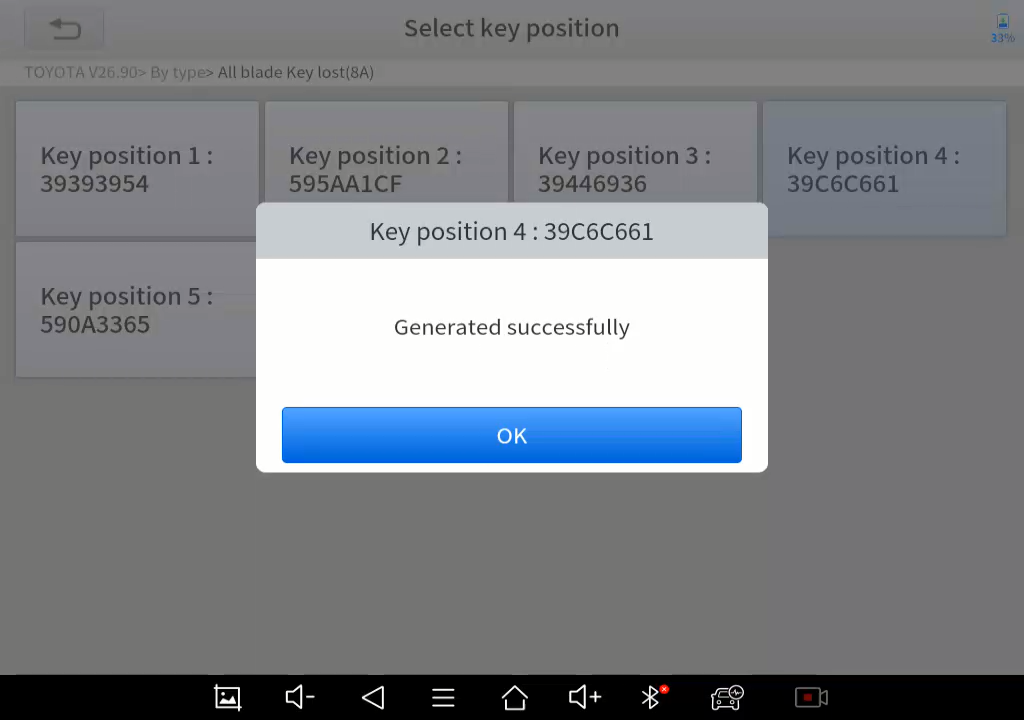
8. Connect the KC100 or KC501 to the device, and put KS-1 inside the slot. The emulated sub master key will be generated.
9. After generated the emulated key, please check if the emulated key could be used. If not, please repeat step 6-8, and remember to change to another key position. To check the emulated key, take the chip out from the unprogrammed key, put the KS-1 close to the ignition switch, insert the key and see if the car could be turned on. The immobilizer indicator light will also turn off.
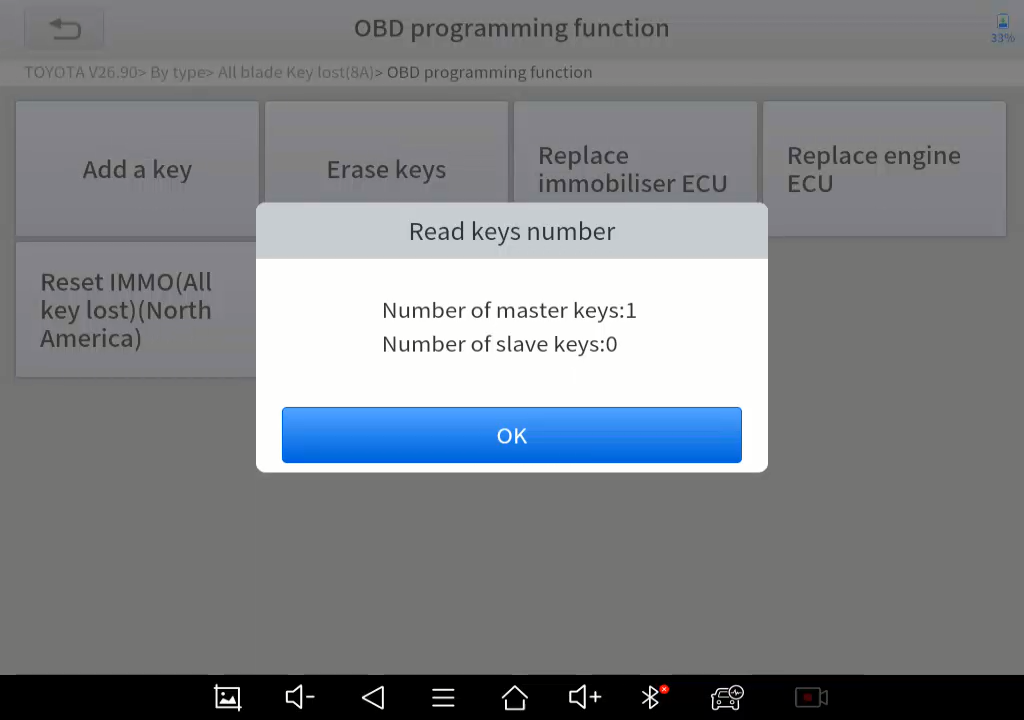
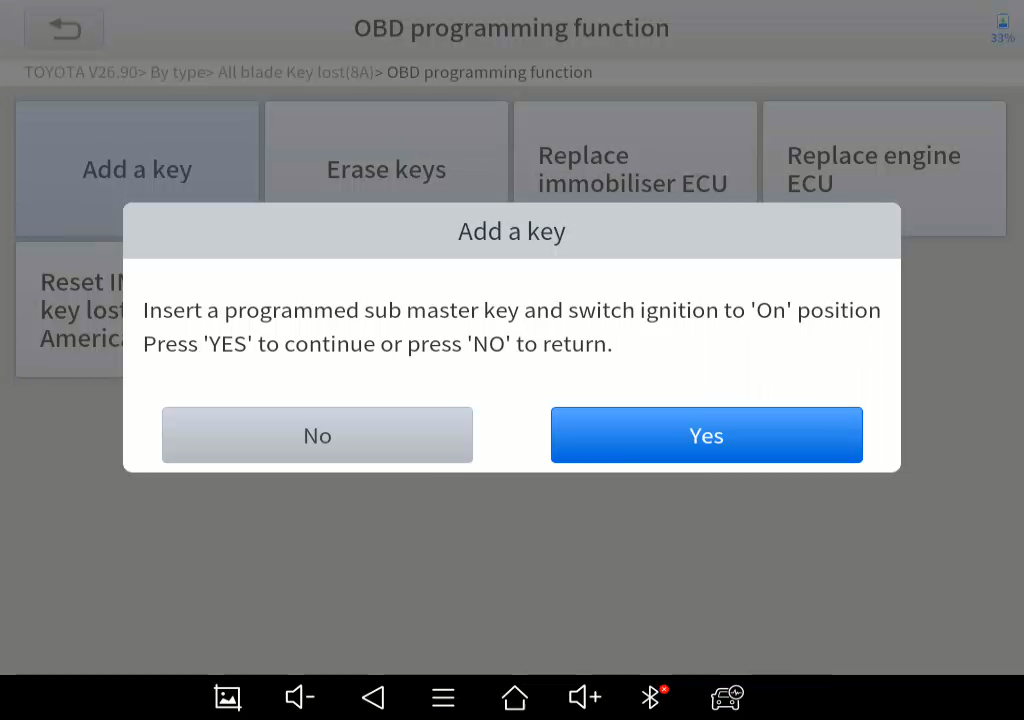
10. If the key could be used, please go to “OBD programming function”. With an emulated sub master key, the rest of the process will be the same as adding a key. We suggest to check the number of registered keys first.
*Note: The KS-1 that emulated is not showed as a registered key so it won’t be shown on the key numbers.
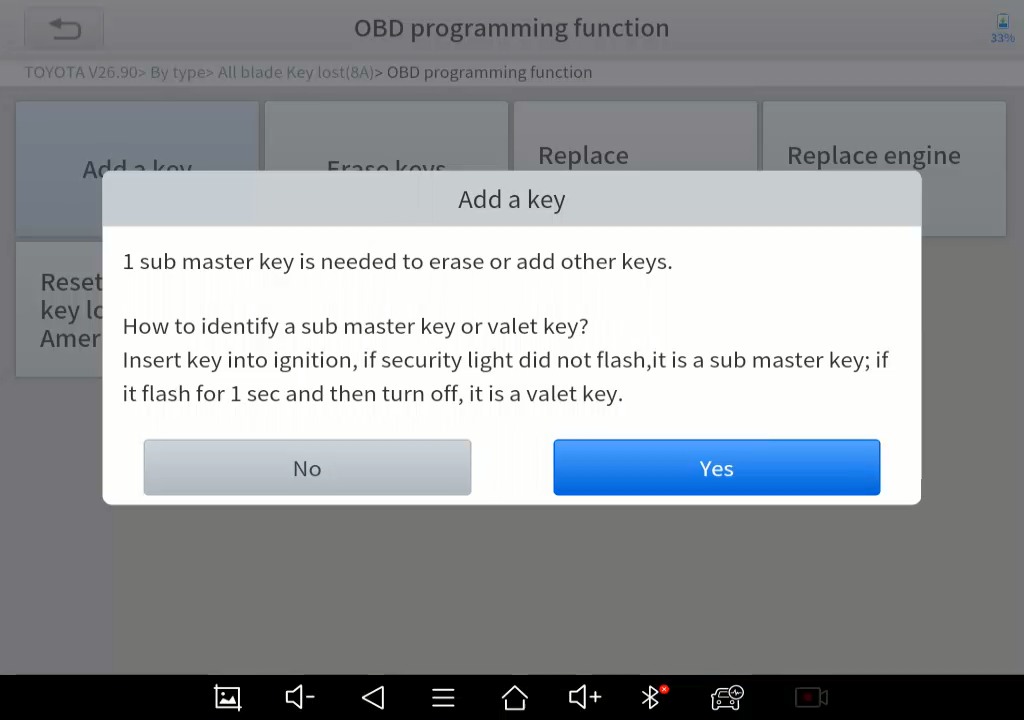
11. Click “Add a key”, check the notice that comes out, then put the KS-1 close to the ignition switch, and insert the new key (without chip) to the ignition switch and turn it on.
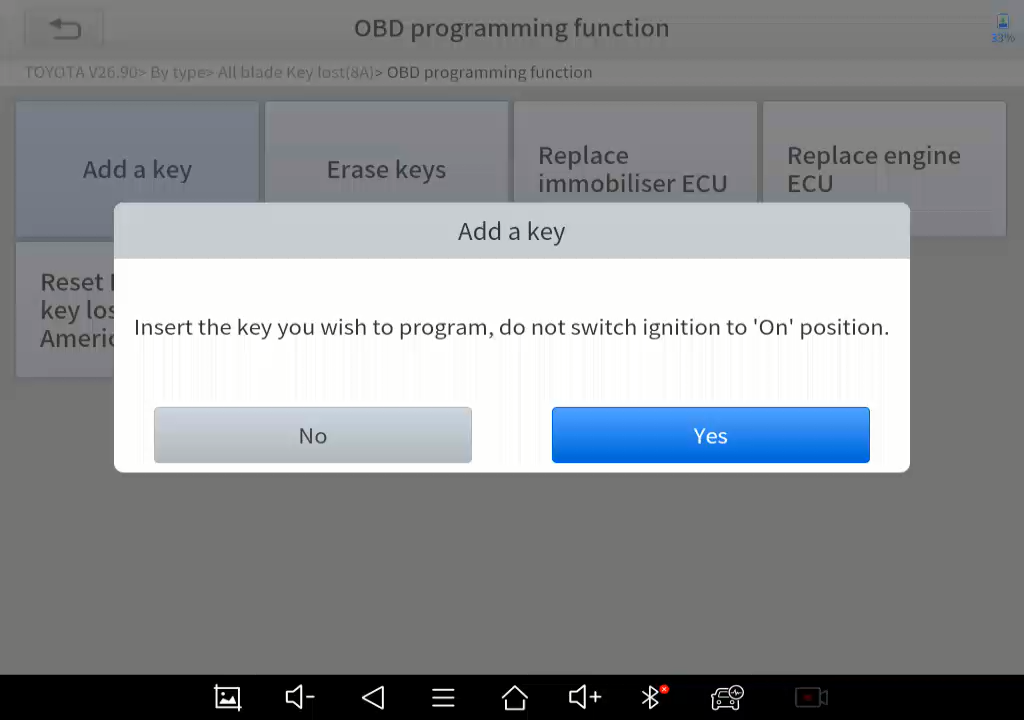
12. When the immobilizer indicator lights up constantly, turn the ignition off, take out the new key, install the chip inside the new key, insert the key inside the ignition switch. Do not turn on the ignition.
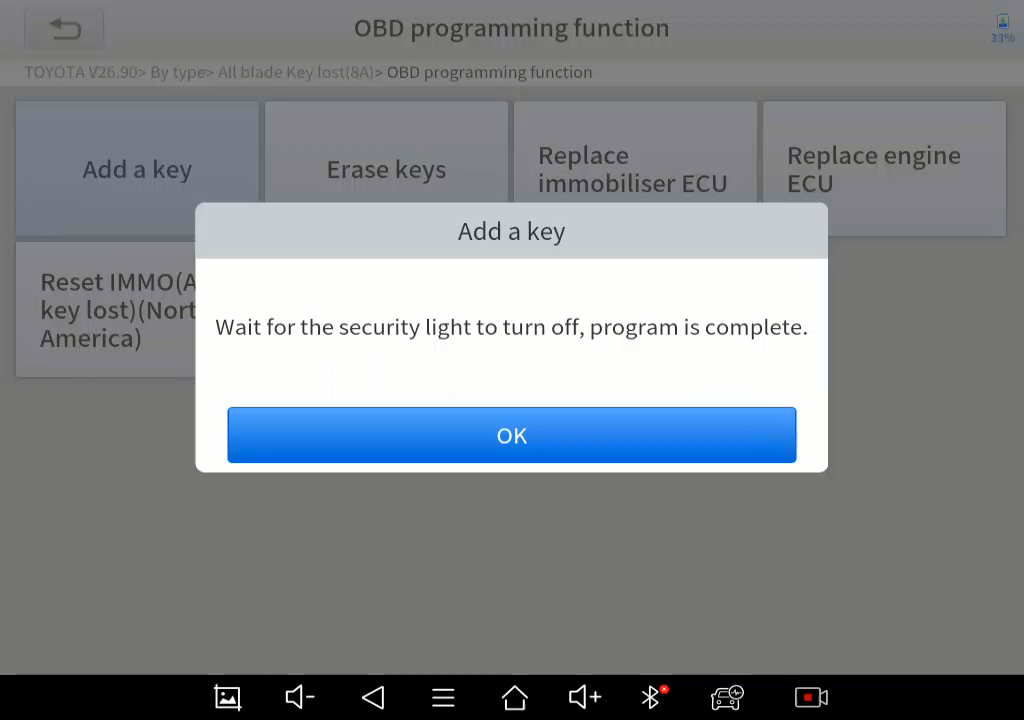
13. Now the immobilizer indicator will flash. Wait for about 1 minute, and see if the indicator goes off. If the indicator goes off, then the key has been added, and the process is completed. If not, please repeat step 11-13.
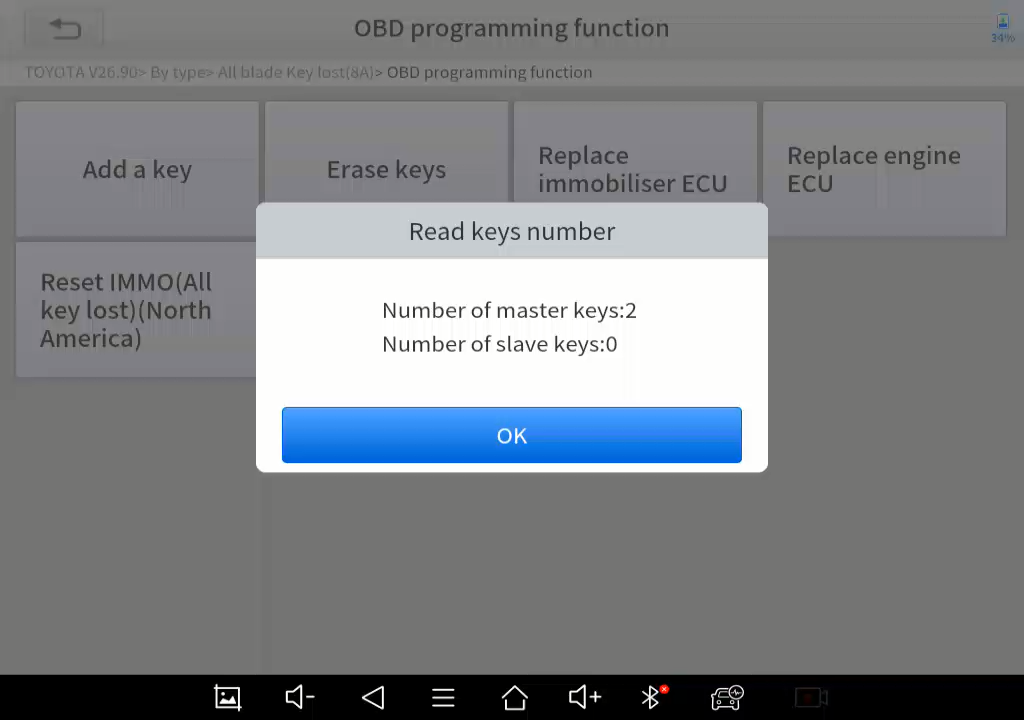
14. After it’s done, check numbers of keys again and compare to the results before, and see if the key has been registered to the vehicle.